Three pages, three style sections
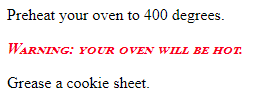
In the last lesson, we put warnings on a page about baking cookies:
<style>
  .important-note {
    color: red;
    font-weight: bold;
    font-variant: small-caps;
    font-style: italic;
}
</style>
<p>Preheat your oven to 400 degrees.</p>
<p class="important-note">Warning: your oven will be hot.</p>
<p>Grease a cookie sheet.</p>
That page is cookies.html.
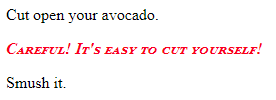
Let's say we make another page about making avocado toast. Call it avocado.html.
<style>
  .important-note {
    color: red;
    font-weight: bold;
    font-variant: small-caps;
    font-style: italic;
}
</style>
<p>Cut open your avocado.</p>
<p class="important-note">Careful! It's easy to cut yourself!</p>
<p>Smush it.</p>
Now another page, about birthday cakes, called birthday-cakes.html.
<style>
  .important-note {
    color: red;
    font-weight: bold;
    font-variant: small-caps;
    font-style: italic;
}
</style>
<p>Light the candles.</p>
<p class="important-note">Careful! Old people have lots of candles! Don't burn your house down.</p>
<p>Blow them out.</p>
So, we have three pages: cookies.html, avocado.html, and birthday-cakes.html. Each one has the same <style> section:
<style>
  .important-note {
    color: red;
    font-weight: bold;
    font-variant: small-caps;
    font-style: italic;
}
Change is the only certainty
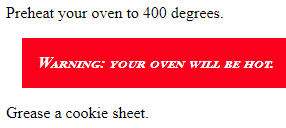
Someone decides you need to change how the warnings look. Here's the new cookies.html.
<style>
  .important-note {
    color: white;
    background-color: red;
    font-weight: bold;
    font-variant: small-caps;
    font-style: italic;
    padding: 1rem;
    margin: 1rem;
}
</style>
<p>Preheat your oven to 400 degrees.</p>
<p class="important-note">Warning: your oven will be hot.</p>
<p>Grease a cookie sheet.</p>
Now you have to change avocado.html, and birthday-cakes.html, to match. No big deal when there are three pages, but what if there are 300?
Ack!
Style sheets
The solution is to separate the <style> section. Put it in a file, and have cookies.html, avocado.html, and birthday-cakes.html all refer to that one file. Those files are called style sheets, and they have the extension css.
Create the style sheet
Make a new file, called project-styles.css. It could be mystyles.css, bob-the-wonder-donkey.css, whatever makes sense to you. Move the CSS rules into the file.
.important-note {
    color: white;
    background-color: red;
    font-weight: bold;
    font-variant: small-caps;
    font-style: italic;
    padding: 1rem;
    margin: 1rem;
}
Don't put the <style> tag into the file.
Reference the style sheet
Remove the <style> section from the HTML files. Replace it with a reference to the css file. Here's the new cookies.html.
<link href="project-styles.css" rel="stylesheet">
<p>Preheat your oven to 400 degrees.</p>
<p class="important-note">Warning: your oven will be hot.</p>
<p>Grease a cookie sheet.</p>
Do the same for avocado.html and birthday-cakes.html, replacing the <style> section with the <link> tag.
Now, if you need to change warning style again, one change to project-styles.css will affect every page. Even if there are 300 pages.
Where do style sheets live?
In the images lesson, we talked about reusing the same images on many pages. We put the image files in a central place, and <img> tags in different HTML files referred to them.
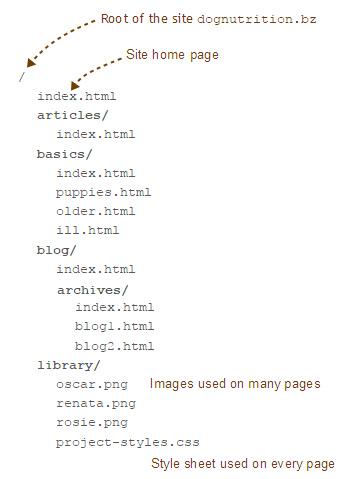
We can do that same thing for style sheets. Here's how we might organize the files for a site.

The style sheet is in the library directory. In every HTML file, we could use the same root relative link to refer to the file:
<link href="/library/project-styles.css" rel="stylesheet">This line would go in index.html, puppies.html, older.html, ill.html, blog1.html, blog2.html, and everything else.
We could change the styles in the entire site, by changing the one file /library/project-styles.css. FTW!
In the next module, we'll talk more about where style sheets go, and how the <link> tag is used.
Exercise
They should use the same style sheet.
Submit the URL of your solution.
(If you were logged in as a student, you could submit an exercise solution, and get some feedback.)
