The story so far
You know to upload files to servers. You know how to make web page by copying a Boostrap template.
Let's get more productive by reusing HTML across your pages. In this lesson, we'll change the starter template into a more efficient, final template.
Reusing the site navbar
Here's how the starter template renders:
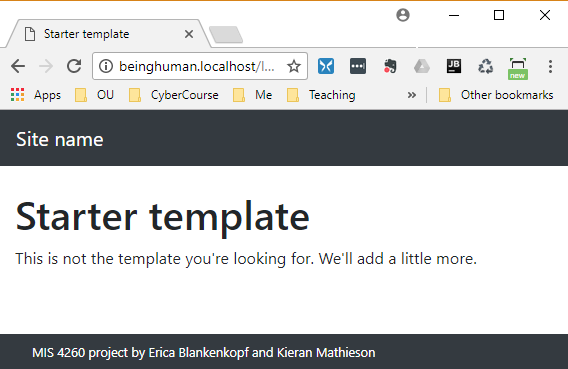
The bit with the site name will soon turn into a navigation bar, or navbar, like the one at the top of the page you're reading now. It will the same on all pages of the site.
Imagine we want to change the site name. From "Site name" to something better, like "Permanent Goats." We would have to modify every page on the site. Ouch!
We've seem this problem before. We talked about how to reuse images. For example, we have one logo image file, maybe logo.png. We link to it from every page, maybe with a root relative URL, like this:
<img src="/library/logo.png" alt="Logo">If we want to change the logo, we change the one file logo.png, and every page on the site changes. FTW!
We did the same thing with style sheets. We created one CSS file, and put it in the library directory. Then we referred to it on every page.
<link href="/library/project-styles.css" rel="stylesheet">We can do something similar with the HTML for the navbar. Put the HTML in a separate file, and include it on every page.
There's a problem, though. <img> tags, <link> tags, and relative URLs are built-in the HTML. Reusing bits of HTML is not. We'll have to use some JavaScript magic.
Changing the template
Let's extract the navbar's HTML from the template. Here it is in the template:
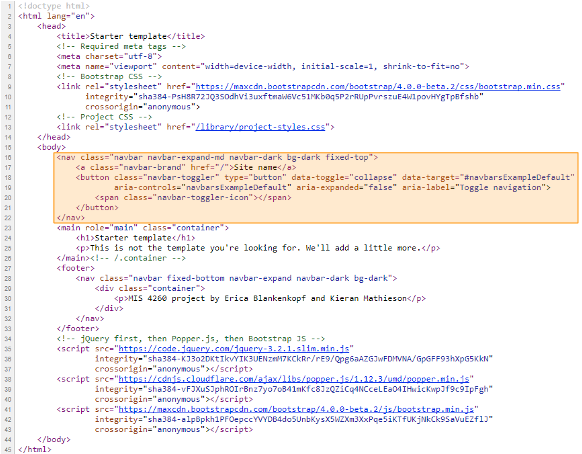
Let's cut that out, and put it in its own file. Let's make a directory called includes, in the library, and put the new file there.
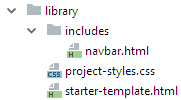
The file is called navbar.html. Here's what's in it, to start with:
<nav class="navbar navbar-expand-md navbar-dark bg-dark fixed-top">
    <a class="navbar-brand" href="/">App Title</a>
    <div class="collapse navbar-collapse justify-content-end"
        id="navbarSupportedContent">
    </div>
</nav>
This will change, as you add the menu links. We'll talk about that later.
In the template, let's replace the navbar code with this:
<div id="navbar"></div>So that part of the template looks like:
<body>
    <div id="navbar"></div>
    <main role="main" class="container">
        <h1>App Title</h1>
<div> is an HTML tag that, by itself, doesn't change the way a page looks. It's just creates a container, that you can style with CSS, or reference in JavaScript.
It's JavaScript that we'll use. We want this line to run.
$("#navbar").load("library/includes/navbar.html");(Don't try it yet. It needs some wrapper code to work.)
$ says to use jQuery, something you'll learn about later. #navbar is a selector, like one you'd use in a .css file. It means "look in the HTML, and find a tag with an id attribute of navbar." It's the same type of selector you learned about in the lesson on applying CSS styles.
So, when…
$("#navbar").load("library/includes/navbar.html");… runs,
jQuery finds…
<div id="navbar"></div>… in the HTML. Then it loads library/includes/navbar.html into it. We put the navbar's HTML into navbar.html, so the navbar appears on the page.
W00t!
Notice the file path is relative: library/includes/navbar.html, not /library/includes/navbar.html.
To get the JS to run, we need to wrap it in some more template code. More in a moment. But first…
The footer
Here's the starter template again:

The navbar was shared across pages, so we moved it into a separate file.
The footer is shared as well. Let's move it into its own file. Here's the footer's HTML in the starter template:
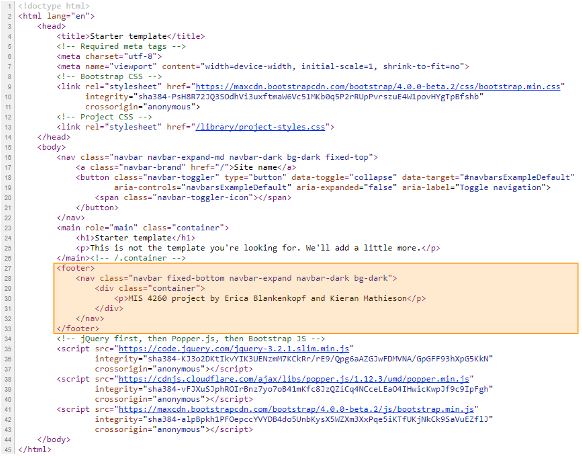
Let's create a new file, library/includes/footer.html. Now the files are:
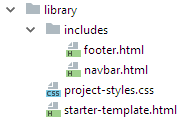
Now let's move the footer code into the new file, and change the text:
<footer>
    <nav class="navbar fixed-bottom navbar-expand navbar-dark bg-dark">
        <div class="container">
            <p>Web app by (your name).</p>
        </div>
    </nav>
</footer>
Now put this in the template:
<div id="footer"></div>This creates a place for the footer code to go.
Here is some of final template's HTML, showing the containers (the <div>s) where the navbar and footer will go:
<div id="navbar"></div>
<main role="main" class="container">
    <h1>App Title</h1>
    <p>Copy this template for all your web app needs.</p>
</main><!-- /.container -->
<div id="footer"></div>
Now for the JS to load the footer's HTML:
$("#footer").load("library/includes/footer.html");The final template
You can download the final template as a zip file. Extract the file to wherever you want your app to be.
The template is always available on a page in the tips and tricks area. You can always grab the zip file there.
For the template to work, the files library/project-styles.css, library/includes/navbar.html, and library/includes/footer.html, have to exist.
There is some extra wrapper code in the template for the JS.
<script>
    "use strict";
    var AppNamespace = AppNamespace || {};
    (function($) {
        $(document).ready(function () {
            //Load the navbar from the library.
            $("#navbar").load("library/includes/navbar.html");
            //Load the footer from the library.
            $("#footer").load("library/includes/footer.html");
        });
    }(jQuery));
</script>
Don't worry about the deets for now.
Change AppNamespace to your project, with the same type of capitalization, and no spaces. For example:
var SubtleMonkeys = SubtleMonkeys || {};Or:
var OrangeNumbers = OrangeNumbers || {};Or:
var RotatingUngulates = RotatingUngulates || {};Whatever your project is about.
It takes a server
We're using $().load() to load shared HTML into a template. It works nicely, except for one thing. It will only work when the files are on a server. It won't work when you open a file on your PC, using the Open dialog (with Ctrl+O), or double-clicking on a file.
What does that mean? Each time you change an HTML file, you have to upload it to a server, before you can see what it will look like.
Unless you use WebStorm. When you're working on a page, you'll see a show-in-browser toolbar in the upper right of the edit area.
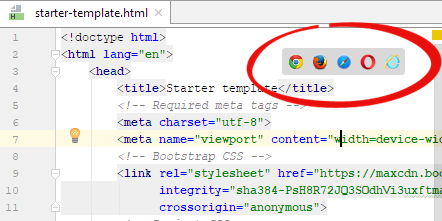
Click on an icon, and WebStorm will start up a temporary web server, open the browser you clicked on, and show you the page. Since the browser is getting the page from a web server, load() works just fine.
How can you tell that WebStorm started a temporary web server? Look at the URL of the page it opens.
If you open an HTML file with the browser's Open dialog, here's what the URL looks like:
![]()
The URL shows that the browser opened a file.
Here's what the URL looks like when WebStorm starts up a temporary web server:

The web server's URL is http://localhost (ignore the numbers after it). load() will work.
Summary
- To make apps easier to maintain, you should reuse HTML that is the same across pages.
- Put reusable code into separate files, and use JS to load them.
- You can use a standard template for all of your apps.
