The story so far
- You know how to make subdomains, and upload files into them.
- You know a few HTML tags. You can make headings, lists, tables, and other things.
- You can mess with fonts and colors.
Boxes
The <p> tag puts white space around text. For example:
<p>This is a paragraph.</p>
<p>This is a not a paragraph. Oh, wait, yes it is.</p>
It looks like this:

There is white space above, below, and to the left and right of each paragraph. Each <p> is in a box, a rectangle of space on the screen.
The text you're reading now is in a box. You could draw a rectangle around the text, with "The" in the upper left, and "right." in the lower right.
Browsers create boxes for <p>, <h1>, <h2>, <ul>, <ol>, <img>, and other tags. Each one creates a box (a rectangular space) on the screen.
You control the box by using the CSS attributes border, margin, and padding.
Let's start with the border.
The border property
You have lots of control over the border around an element.
img {
  border-style: solid;
}
...
<img src="oscar_snow.jpg" alt="Snow dog">
The default border style is hidden, meaning no border.
There are four borders around the image: top, right, bottom, and left. border-style sets all four to be the same. You can give each one a different style. For example:
img {
  border-top-style: solid;
  border-right-style: hidden;
  border-bottom-style: groove;
  border-left-style: dotted;
}
Margins and padding
We're talking about boxes around elements. We've talked about borders. Another attribute, margin, let’s you control the spacing around an element.
Suppose I had this HTML:
<h2>Some things</h2>
<p>Here are some things.</p>
<h2>More things</h2>
<p>Here are more things.</p>
It looks like:
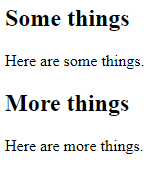
Let's add borders and color to the <p> tag.
<style>
  p {
    border-style: solid;
    background-color: orange;
  }
</style>
<h2>Some things</h2>
<p>Here are some things.</p>
<h2>More things</h2>
<p>Here are more things.</p>
There are two properties that add spacing around elements: margin and padding. They're easy to confuse. Let's start with margin.
<style>
  p {
    border-style: solid;
    background-color: orange;
    margin: 2rem;
  }
</style>
<h2>Some things</h2>
<p>Here are some things.</p>
<h2>More things</h2>
<p>Here are more things.</p>
Here it is:
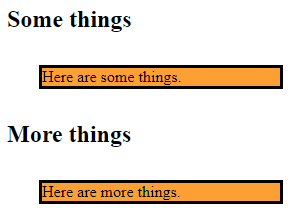
margin adds space outside the border. The 2rem is the size of the margin. A rem is roughly the size of the letter "m" in the base font of the page. Rems scale well.
Now let's switch from margin to padding.
<style>
  p {
    border-style: solid;
    background-color: orange;
    padding: 2rem;
  }
</style>
<h2>Some things</h2>
<p>Here are some things.</p>
<h2>More things</h2>
<p>Here are more things.</p>
It looks like:

The space is inside the border. So margin adds space outside the border, and padding adds space inside the border.
You can combine margin and padding.
<style>
  p {
    border-style: solid;
    background-color: orange;
    margin: 2rem;
    padding: 2rem;
  }
</style>
<h2>Some things</h2>
<p>Here are some things.</p>
<h2>More things</h2>
<p>Here are more things.</p>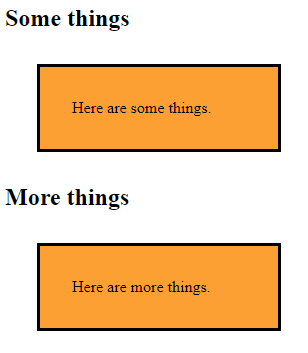
Developer tools
Use the developer tools to experiment with borders, padding, and margin. Press F12 to open them, and choose the Elements tab.
For example, if I'm not sure of the difference between margins and padding, I can use the developer tools to experiment.
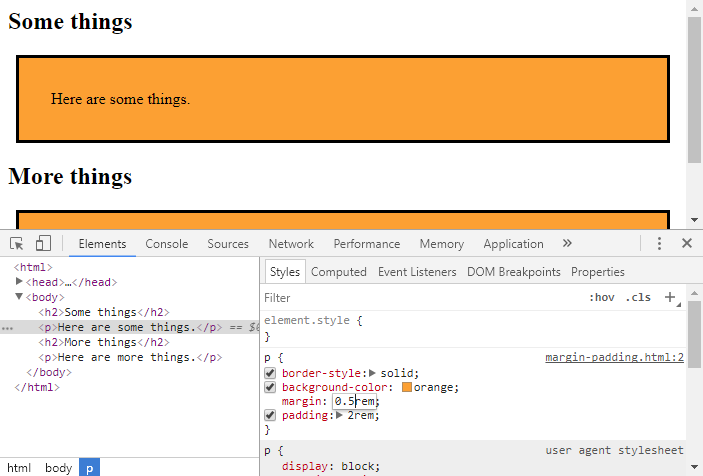
Here, I'm messing with the margin. The browser immediately shows me the effects of the changes.
Remember, the changes are temporary. Refresh the page, and the original code is restored.
Messing with mix-ins
Here's a sandbox. Try messing with the border, margins, and padding of both classes. Notice that one a mix-in class.
Remember that Ctrl+/ comments out a line. Try it on line 4.
Styling tables
Earlier, you learned how to make tables. For example:
<table>
  <tr>
    <td>DOG 101</td>
    <td>Introduction to the modern dog</td>
    <td>MW 9:00am - 11:00am</td>
  </tr>
  <tr>
    <td>DOG 110</td>
    <td>Dogs in the ancient world</td>
    <td>M 6:30pm - 9:30pm</td>
  </tr>
</table>
This renders as:

That doesn't look very good. No worries, you can add borders, margins, and padding. For example:
You can add some styles:
<style>
    table {
        border-color: gray;
        border-style: solid;
    }
    td {
        padding: 0.5rem;
        border-color: lightgray;
        border-style: solid;
        border-width: thin;
    }
</style>
It looks like:

OK, still not great, but Bootstrap will make it look better. We'll get to that soon.
Of course, you can use the developer tools to experiment with table styling. Give it a try.
<style>
    h1, h2, p {
        font-family: sans-serif;
    }
    h2 {
        color: white;
        background-color: black;
        margin: 0.5rem;
    }
</style>
<h1>Good Dogs</h1>
<h2>Renata</h2>
<p>Renata is a good dog.</p>
<h2>Rosie</h2>
<p>Rosie is a good dog, too.</p>
(Notice how I applied styles to <h1>, <h2>, and <p> all at the same time? Cool!)
It looks like this:
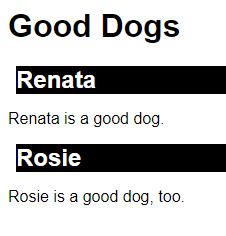
That's not what I want. I want this:

Please fix the code for me. Do it by changing as little as possible.
Upload the fixed file. Submit the URL.
(If you were logged in as a student, you could submit an exercise solution, and get some feedback.)
Summary
- You can use CSS to control the borders and spacing of HTML elements.
borderadds borders to elements. You can control the border's color, thickness, and other things.marginadds space outside an element's border.paddingadds space inside an element's border.- You change the border and spacing of
<table>elements. - Use the developer tools (F12) to experiment.
